Do you wish there was an affordable, easy-to-use tool that would allow you to update your home to reflect your style preferences? Believe it or not, there is! Whether it’s a living room, bedroom or basement, you can make any space in the home uniquely yours by creating simple wall designs with tape – particularly painter’s tape.
Painter’s Tape Transformations: Why DIYers Love Decorating Walls with Tape
Walls are blank canvases that provide endless possibilities when it comes to personalization. DIYers might customize a space by decorating walls using tape, a bit of paint and creativity. Whether you’re executing a solid color or an intricate pattern, you can use tape to create it.
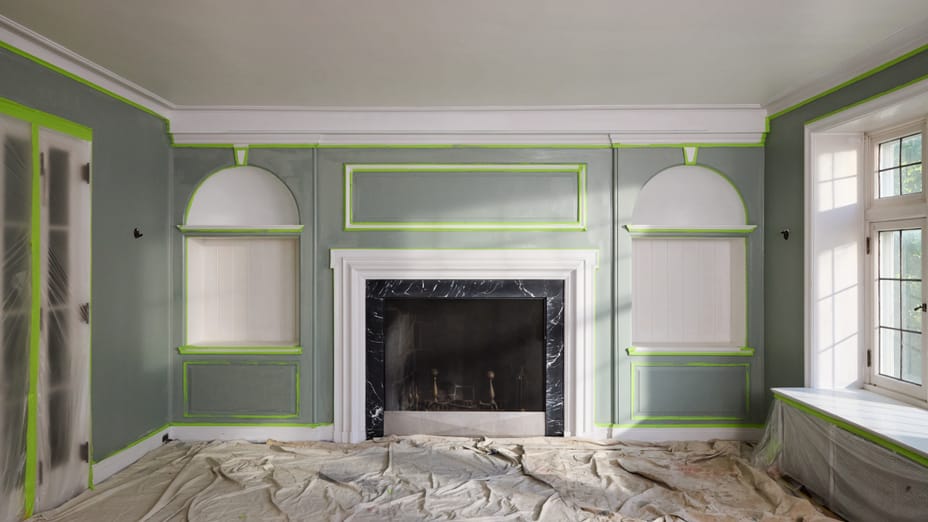
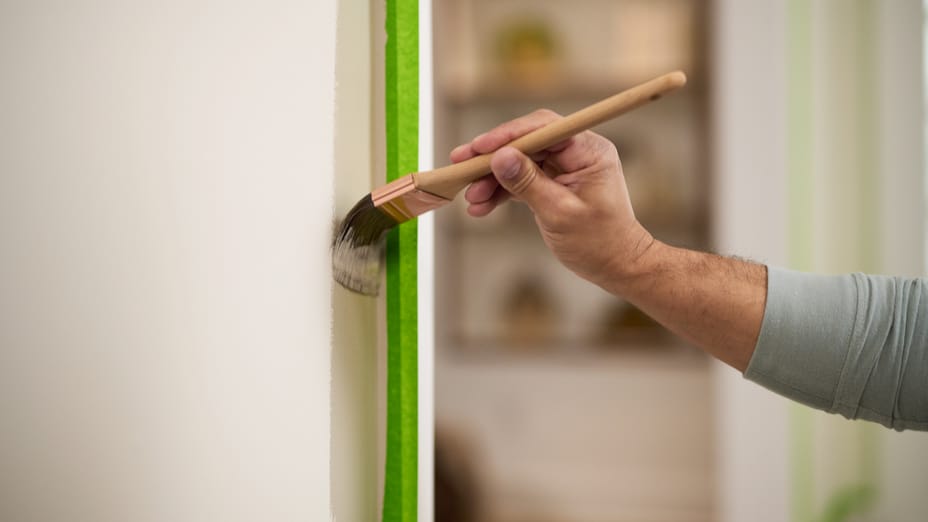
Painter’s tape is a versatile tool that will help bring your ideas to life by creating a border for your paint and ensuring clean, sharp lines. Some tapes, like FrogTape® brand painter’s tape, are made with technology to prevent paint bleed. Painter’s tape also can be used to protect surfaces that you don’t want to paint, like woodwork, windows and switch plates.
Best of all, the tape can be used by painters of all skill levels to execute their ideas to perfection.
From Plain to Patterns: Wall Painting Ideas with Tape
If you want to create a wall design but aren’t sure where to start, consider one of these classic wall painting ideas:
- Geometric shapes: Painter’s tape makes it easy to outline geometric shapes like rectangles, squares and triangles. Some might configure one large shape, while others may opt to make a motif with multiple shapes.
- Patterns: Add interest to walls with options like argyle, buffalo check, diamonds or gingham. Use painter’s tape to help keep lines sharp and evenly spaced.
- Stripes: Stripes are a simple way to make a statement. When you add stripes, keep in mind that horizontal lines will make your space feel wider, while vertical lines will make the room feel taller.
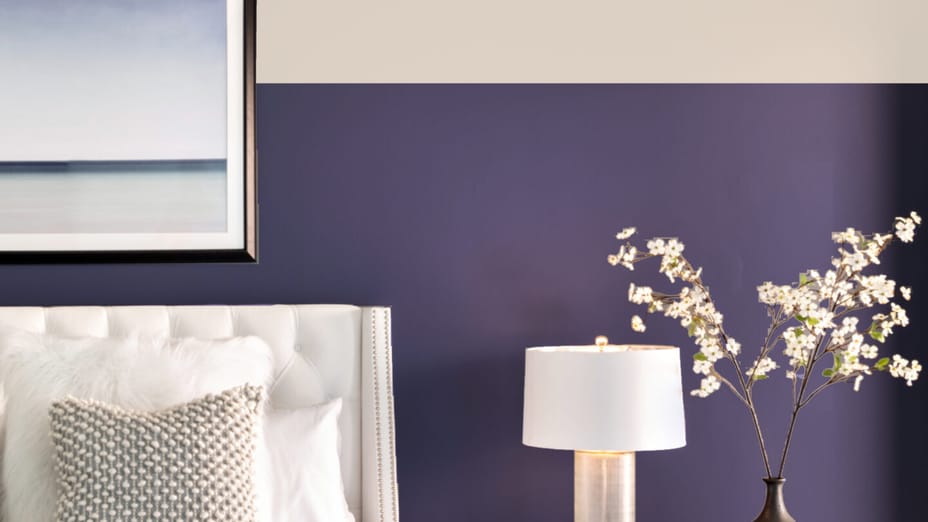
- Two-toned walls: Two-toned walls, or color blocking, use two paint colors on the same wall, either divided evenly or in varying ratios. Color blocking is typically executed in two ways, either horizontally or vertically.
These unique options allow you to add personal flair to any room. Complete the look with a color palette and décor that is true to you too.
Toolbox Necessities for Wall Designs with Tape
Once you’ve decided on the tape design you want to execute, gather the necessary supplies to ensure a professional finish.
- Painter’s tape: Painter’s tape is a key component in executing tape designs. With the right product, you’ll achieve a painting project that looks like it was done by a professional, and the tape will peel off without wall damage.
- Paint: Pick the paint colors and finishes of your choice. Color can be a powerful tool – like creating contrast or making a room a monochromatic palette.
- Paintbrushes or rollers: Paintbrushes will be easiest for outlining edges along painter’s tape. Depending on the size and scale of the composition, you also may want rollers to fill in large spaces.
- Straight edge: When you’re ready to determine the placement of lines and angles a measuring tape will be ideal for even spacing. Additionally, a solid edge like a level or yardstick will come in handy for ensuring lines are straight.
- Pencil for marking lines: Keep a pencil on hand to make marks where painter’s tape will be applied.
With these materials, you can take on the task with confidence.
6 Steps to an Easy Painter’s Tape Wall Design
Take the stress out of design work by following a few simple steps:
- Sketch your plan including the pattern placement, size and scale of shapes and the color palette. Start on a piece of paper before moving to the wall.
- Wipe down walls with warm, soapy water and patch any holes or cracks to ensure the surface is clean before you apply the tape and paint.
- Measure and mark how you’d like the pattern to appear on the wall including the size and width.
- Apply the painter’s tape and ensure the tape is adhered to the surface to prevent paint bleed.
- Paint the pattern, following the outline made by the painter’s tape.
- For the best results, remove the tape while the paint is still wet. This step will prevent the paint from bonding to the tape and cracking when removed.
By following these directions, you’ll be left with a project you can be proud of.
Paint Patterns like a Pro
Painter’s tape wall designs are one simple way to create a space that reflects your style. For more step-by-step project tutorials, tips, tricks and creative inspiration, explore our Resources section.