
Inspiration
4 Dorm-Friendly Decor Ideas That Won't Cost Your Security Deposit
Personalize your dorm or rental without nails, holes or security deposit drama.
Using bright, bohemian colors, FrogTape® and a few paint rollers, Melissa, from Welcome to the Woods, made an amazing sunset wall feature for a bedroom.

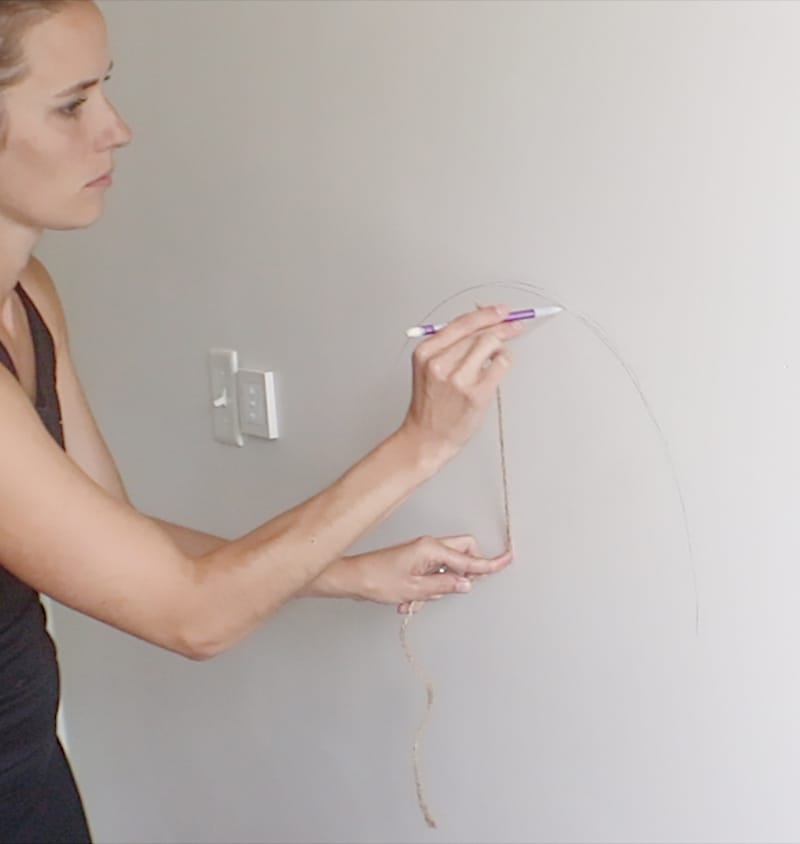
To get started on your sunset wall design, sketch your design with pencil, so that each section of color is mapped out. Melissa suggests tying a pencil to one end of a piece of string, as to create a half-circle shape drawn for the sun. After that, tape off the edges of the wall with FrogTape®.
Begin rolling on your first coats of paint. Pro tip: Alternate which color to paint, so the edges are dry a bit when you come to roll a color right next to it.
Begin rolling on your first coats of paint. Pro tip: Alternate which color to paint, so the edges are dry a bit when you come to roll a color right next to it.
After letting the first coat dry for at least four hours, roll the second coat on every other color. Then, let the paint dry a full day.

After the paint has been dry for at least 24 hours, you can use FrogTape® Delicate Surface to create your edge lines. Rip the tape down the middle to create a jagged, landscape look. Remove the tape immediately after rolling paint for crisp lines!
Run strips of tape away from the semi-circle sun to create rays. Space these however you like using the meter stick to help. Measure sun rays at varying lengths and begin to score the tape with your razor blade knife. To create perfectly straight lines, line the meter stick up with the edge of the tape, score and repeat on the other side of the tape. Peel off your rectangular cut-out from your tape strips and now you’ve created a sun ray template!
Fill your sun rays with at least two coats of paint, and peel off the tape when the last coat is still wet.

Finally, touch up the paint with your brush as needed. Then, remove all your painter’s tape from the mural’s edges and reveal perfectly crisp lines to your sunset wall!

More ideas like this
Inspiration
Personalize your dorm or rental without nails, holes or security deposit drama.

Inspiration
Five damage-free hook ideas to reclaim floor, counter and closet space in any dorm or small apartment

Inspiration
New FrogTape® brand survey reveals homeowners are turning to cozy palettes, practical updates and smart tools for success to keep homes in style affordably